
Borderless printing of endless rolls does not always work naturally with the Epson Colorworks CW-C6000 series.
We’ve had to apply these settings to customers many times before and have created the ideal starting point to start from.
In 90% of the cases this works immediately, but because there can be small variations per printer, you may have to make a small vertical position adjustment.
We have made a different step-by-step plan for both MAC and Windows. For windows, see below for Mac, look at this post.
Windows CW-C6000 borderless printing endless roll
- Printer driver settings (create new label)
Open the printer driver and specify the desired size and media settings.
Important here are the “Print media shape“, “Set up for paper handling after” & “Gaps between labels“.
Media shape: Continuous label
Gap between labels: 0.0
Paper handling setting after: Cut (on the specified label) [Cut interval: 1]
Save this label by pressing [Definitie afdrukmateriaal] and add a new label.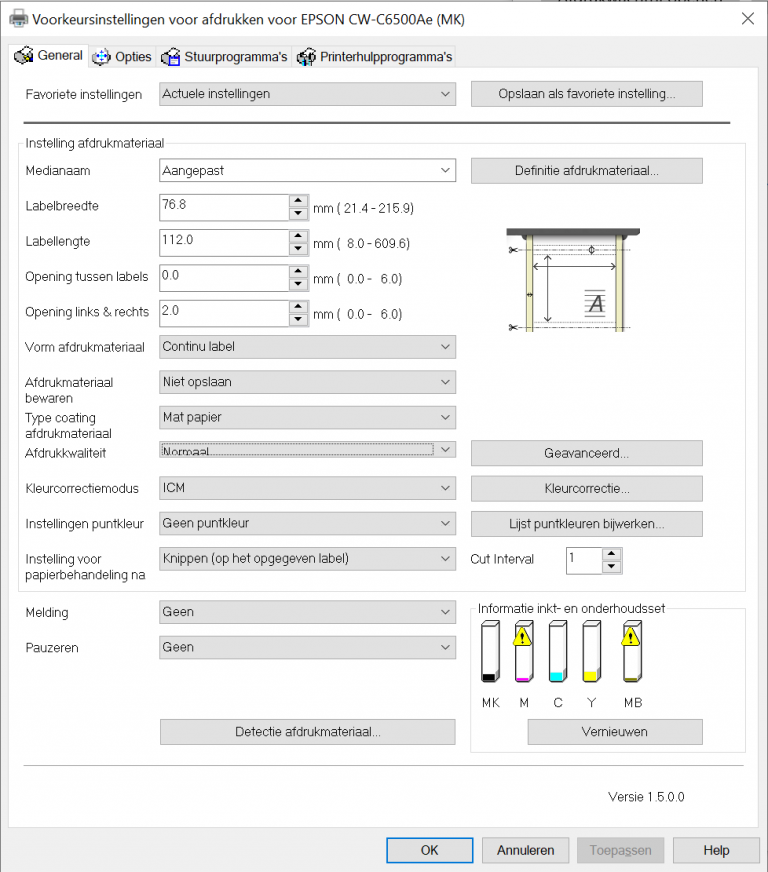
- Printer setting utility
Now we have to adjust the settings of the printer, if you have multiple printers, you must do this separately for all printers.
If you have a fleet of C6000 printers, please contact us for a manual to distribute this over multiple printers.
In preference settings, navigate to the last tab “Printer Utilities” and press “Printer Setting Utility”.
A new window will open, where we can adjust the settings of this printer.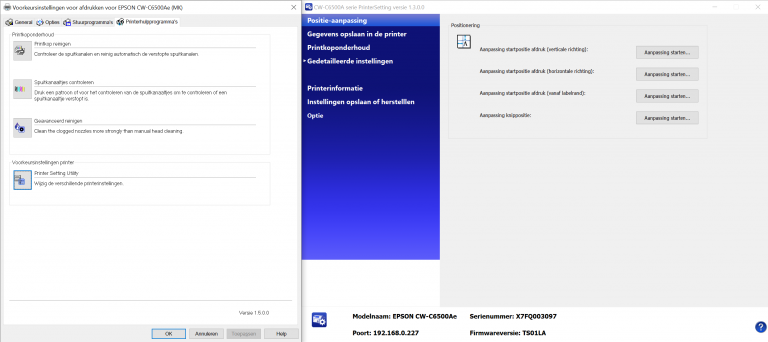
- Vertical start position
Press “Print Start Position Adjustment (Vertical Position)”.
This must be at 0.0 mm. confirm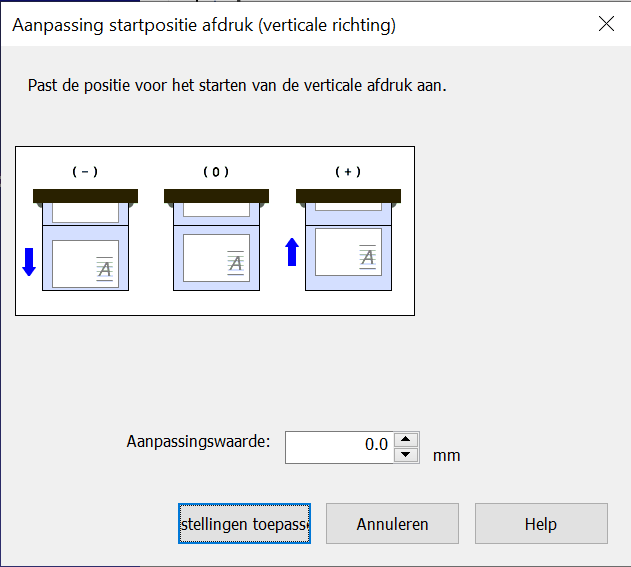
- Label edge start position
Press “Print start position adjustment (from label edge)”.
This must be at -1.5 mm. confirm

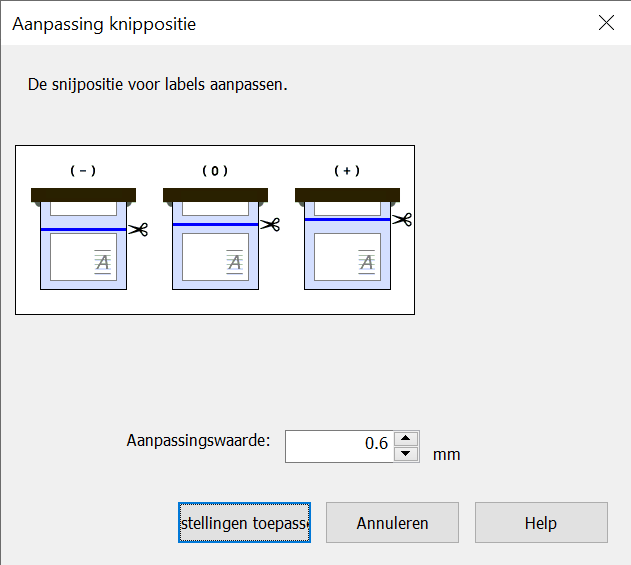
- Cut position adjustment
Press “Cut Position Adjustment”.
This must be at -1.5 mm. confirm
- Test print
You can now make a test print with the correct preference setting.
PLEASE NOTE: that this will be printed in full size and the file will have a bleed before printing.
Immediately check whether the format is indeed the desired length.
Adjust length: If the length does not meet expectations, you can adjust it in the driver.
Still a white border above or below?
Then it is best to try to remove it with the vertical position from step 3.
Do you still have problems?
Please contact us and we will try to solve it together with you.